Setting up your lights, for the best shot can be a big pain in the back. So I thought to share, some of my favorite indoor & outdoor lighting setups, to help the photographers who are still in their “I am learning photography” stage. These lighting setups, are helpful in all kinds of, indoor or outdoor lighting conditions. I have previously shared my one light setups on my blog. And due to amazing responses and comments here are some more.
While learning photography, there always comes a stage, where you ask your self a question. “How did this guy got this shot?”. Many of my fellow photographers, ask me the same question. So as the answer to all those questions, here are some of my favorite indoor & outdoor lighting setups.
Setting up the lights should be one of the easiest steps, but it is a nightmare for many photographers. Because they try to do everything in one go. I would suggest all the photographers, who are learning photography, to start with one light first. Once you master your one light setups, try to add another source (only if required). More number of lights means more confusion on the lighting setups. So try to keep your lighting setups as simple as possible.
Indoor lighting setups
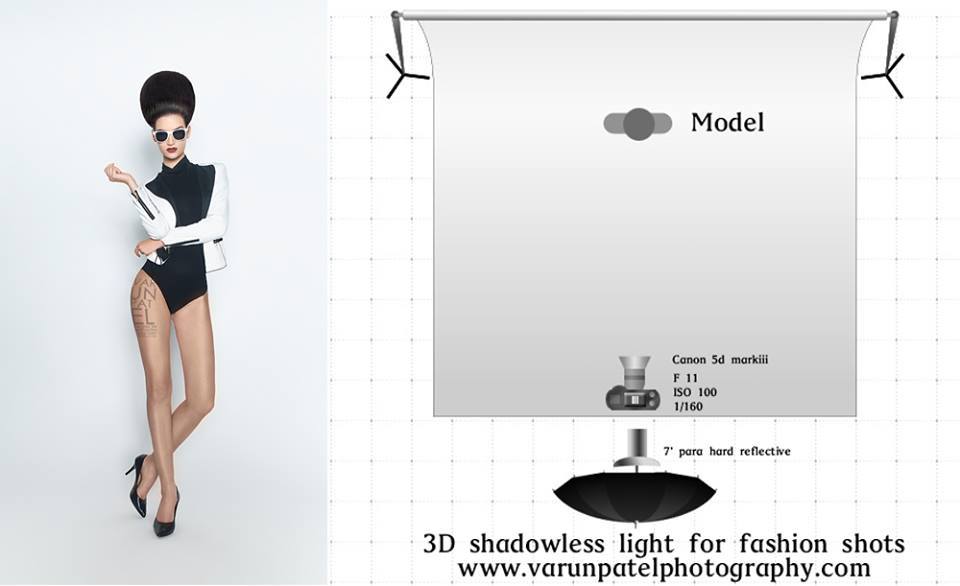
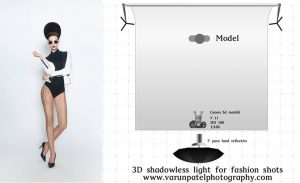
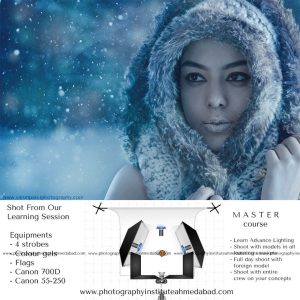
When you are shooting indoor, you are working on a blank canvas. So in a way it is an easy to start, as you do not have any pre-defined lights to manage. All you have to do is setups your main light, and you are ready to shoot. But indoor lighting setups will also take a lot of practice. As you will be starting the lighting setups from scratch. So here are few lighting setups, which can help you quickly build a lighting setup for your shoots. I have tried to add as much info as I can, with the images and lighting diagrams.
So as you can see, all our indoor lighting setups are mostly with one or two lights only. Sometimes for some particular effects, I defiantly use more lights. But most of the time it is one or two lights maximum, paired up with some reflectors or flags.
Outdoor lighting setups
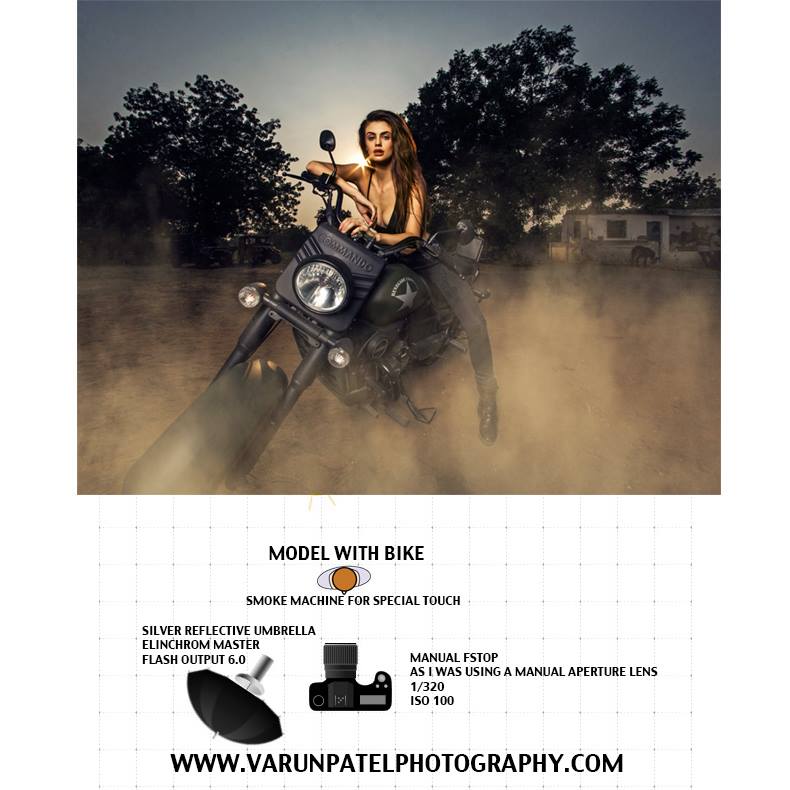
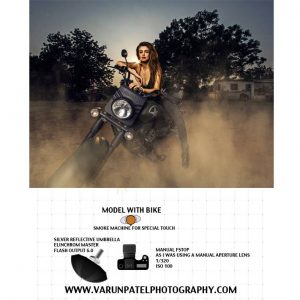
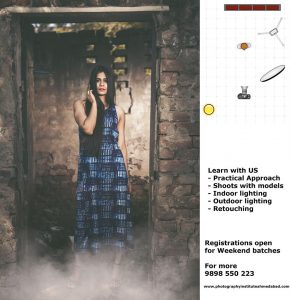
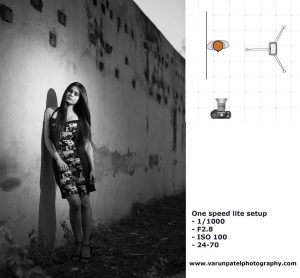
Compare to indoor setups, outdoor lighting setups are much easier to work with. The reason is, there is always some ambient light, to help you out with your base exposure. So all you have to do is, expose for your ambient light, adjust the ambient light according to your EV line. And once your base exposure is ready, add your flashes where ever required. Outdoor lighting setups are much easier to understand. Outdoor lighting setup defiantly will require more power from your flashes. So make sure whenever you are shooting outdoors, your flashes are fully charged. Reflectors are also a great source, for outdoor lighting because they provide a continuous light, which helps you visualize your outcome, without taking the picture.
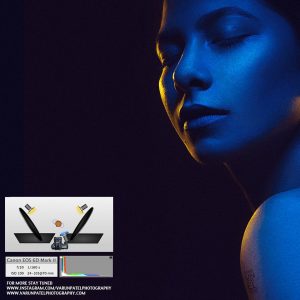
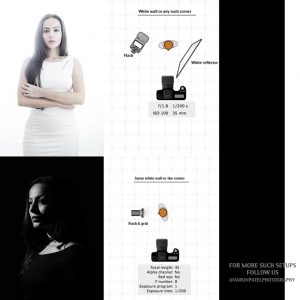
In our all setups shown above, my main light source is mostly the flash. The figure2 is the only shot where we used the reflector as the main light, and flash as the background light, the reason for this was the direction of the sun. Sun’s direction during that time was such that the background and model were merging together, so to create enough separation there we had to use the flash as the background light. The other two shots are with flash as the main light source. On the figure1, with the bike, the light source is a large reflective umbrella for soft but punchier light. And on the extreme right shot, the light source is a bare flash, to produce enough power, which can help for cutting down the ambient light and create enough drama.
So as the conclusion to the above discussion, my suggestion to all the photographers is, Keep your lighting setups simple. It will make your work with peace of mind. Good lighting setups are always important, but make sure as a photographer you have to direct the model and the crew also for the best outcome. So a simple lighting setup will help you focus on everything, and you will be able to produce amazing pictures with less effort.
Are you looking forward to learning more about lighting? Check out our courses at www.photographyinstituteahmedabad.com
Would anybody else dare to take this route of putting one’s leg on an axe..? Though the content is meant for those who feel like being beginner in photography field, surely many many of professionals are not still capable of handling the lighting issues with respect to creating the dramatic effect with zero-flaw for capturing billboard displayable images.
This article is very important for all those who feel they need to grow as photographer.
Thanks for sharing the knowledge.
Mr Brenal Khatri none else can understand and present this efforts like you do. Thanks for being such appreciator to our hard work and it is my pleasure to have people like you coming to us for learning.
Thnks for giving us for this important discussion.
I’m just started my photography career in wedding and fashion photography so plz suggest which lighting satup i use.
Raja, as a beginner you should keep your kit simple. Your kit should have, as you are doing wedding and fashion, a wide angle lens, a medium telephoto lens and a normal range prime lens. You should also buy some reflectors to help you while shooting in daylight. And a flash and triggering system can come handy too. So unless you find your shooting style, and your most used focal length and stuff. My suggestion would be to stick with a basic kit only.
Raja, i would also suggest you check out our recent post, “10 things to consider before starting photography career as beginner”, which is perfect article for any photographer starting their career in photography.
Thnkyou so so much sir for share your knowledge for me to suggest how to start my photography career. Really my dream i won’t to be next varun patel. Thnks sir
Thanks a lot.It will help everyone.
Thanks